A reliable heating system makes a cold winter easier to manage. A new furnace is an upgrade to your system’s efficiency as well as your family’s comfort. From the first visit from our team to the moment your new system hums to life, each step makes sure that your new equipment performs perfectly. Let’s walk through exactly what happens during a professional furnace installation so that you know what to expect.
Step 1: Preparing Your Home and the Installation Area
Before the furnace installation begins, your team will review your setup and confirm the details of your appointment. You can help things move along by preparing the area around your furnace. Clear any items near the unit so that we have enough room to move safely. If your furnace is in a basement or garage, make sure the path from your front door to that space is clear as well.
Pets should stay in another room or area during the appointment to avoid stress or interruptions. If you plan to upgrade your thermostat, make sure to mention it ahead of time so that we can install and connect it during the same visit. Before the crew arrives, check that your gas and electrical connections are easy to reach. For gas furnaces, confirm that your gas line is in good condition and that your gas meter is easily accessible. For electric models, make sure your electrical panel isn’t blocked.
Step 2: Reviewing and Removing the Old Furnace
When your installation team arrives, we’ll begin with a quick walkthrough of your home. This includes checking your existing furnace, thermostat, ducts, and venting to make sure everything is safe and ready for the new system. We will explain what you can expect throughout the day and answer any last-minute questions before we get started.
Next comes the removal of your old furnace. The team will shut off the gas supply and power to the unit, disconnect the wiring, and detach it from your ductwork. We’ll also remove the vent pipe that connects your furnace to the outside. Our crew will handle this carefully, making sure to avoid releasing debris or damaging nearby connections. Once we disconnect the old furnace, our team will carry it out of your home. We will handle the disposal of the unit so you do not need to worry about managing it.
Step 3: Setting the New Furnace in Place
After the old unit is out, it’s time to bring in your new furnace. We will position it on a stable, level surface, using vibration pads or mounting brackets to keep it secure. Proper leveling is important because even a slight tilt of the unit will affect airflow. Once the furnace is in place, we connect it to your duct system. We seal every connection with care to prevent leaks that could waste energy or reduce efficiency.
If your new furnace is a high-efficiency model, it may require additional venting or a condensate drain line to handle moisture buildup. We will take care of these connections so that everything meets building codes and manufacturer standards. At this point, we also connect the electrical wiring and gas line. We double-check all joints and fittings to make sure everything is tight and safe.
Step 4: Installing the Thermostat and Controls
Once the furnace is physically connected, we move on to the thermostat. If you are upgrading yours, like to a programmable or smart thermostat, we will install it and connect it to your new system. Smart thermostats help save on energy costs by using your schedule to adjust temperature settings.
Our team will verify that the thermostat communicates properly with the furnace and that it can turn the system on and off as needed. If you’ve chosen a Wi-Fi-enabled thermostat, we’ll guide you through connecting it to your home network and using the app for remote control. This step makes sure that when your furnace starts heating, you will have full control over comfort and efficiency from the start.
Step 5: Connecting Venting and Drain Lines
For gas furnaces, the exhaust gases need a safe exit route outside your home. The installation team connects vent pipes to ensure proper airflow and compliance with safety codes. High-efficiency furnaces tend to use PVC venting that draws in outdoor air for combustion and safely exhausts byproducts. We measure and align these pipes with precision to prevent condensation or exhaust leaks.
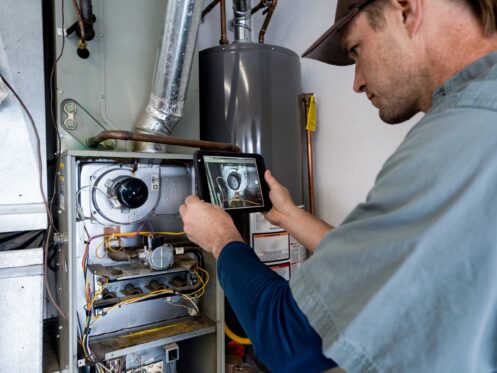
Step 6: Testing and System Start-Up
Once the furnace is fully connected, we will power it on for the first time. This is where everything comes together. We run the system through a start-up cycle to make sure every component works properly. During this test, we will check the gas pressure or electrical output and confirm that the blower motor runs smoothly. We will also verify that the system reaches the correct temperature.
We also inspect for any unusual noises, odors, or vibrations that could indicate a loose connection. If our team notices anything out of place, we will make adjustments on the spot. Once we find that everything is in order, we will confirm that your living space is receiving even, consistent heat.
Step 7: Final Walkthrough and Homeowner Orientation
After testing the system, we will conduct a final walkthrough. We’ll explain how your new furnace works, how to operate the thermostat, and what maintenance it needs. You’ll learn how often to replace filters, what warning signs to watch for, and when to schedule your first tune-up. This walkthrough gives you a chance to ask questions. If you’re curious about energy-saving settings, air quality upgrades, or warranty details, our team will explain everything before wrapping up.
At this time, you can also review financing details if you chose a payment plan. Many homeowners prefer to finance their new furnace to spread the cost over smaller, manageable monthly payments rather than paying the entire amount at once. If you did not select a plan earlier, your technician can share options available through Bryant Heating, Cooling, Plumbing & Electric before leaving.
Step 8: Cleanup and Disposal
Once you are comfortable with your new system, our crew removes all packaging and tools from the installation area. Our team will vacuum or sweep around the furnace to leave the space as clean as when we arrived.
Step 9: Post-Installation Care and Maintenance
Now that your furnace is up and running, keeping it in peak condition is the next step. Replace your air filter regularly, every one to three months, to maintain healthy airflow and efficiency. Schedule an annual professional maintenance session each fall to inspect and adjust your system before winter.
A well-maintained furnace runs more efficiently and helps keep your energy bills in check. If you notice any unusual smells or uneven heating, contact Bryant Heating, Cooling, Plumbing & Electric right away. Don’t forget to sign up for a maintenance plan for routine inspections and priority service. Opting for one of these removes the stress of having to remember to schedule a maintenance session each year.
Enjoying the Comfort of a Professionally Installed Furnace
By understanding the furnace installation process step by step, you know exactly what to expect on the big day. Each stage ensures your home stays warm, efficient, and safe through the coldest months of the year. If you are ready to have your new furnace installed, schedule an appointment today.
